Monday, July 30, 2012

The Great Homemade Deodorant Experiment of 2012, Part 2


So, as I mentioned in Part 1, my first batch of homemade deodorant was effective, but very messy. In fact, I’ve come to the conclusion that this stuff actually works BETTER than the commercial deodorant I was using previously. I got the The Man of the House to try it, as well, though he was skeptical that it would work for a guy. I can attest that he’s been smelling great, although he wasn’t thrilled with the messy gloppiness, and wasn’t a big fan of the idea of applying the deodorant with his fingertips. So… I did a little more experimenting, to come up with something that was still effective, but a little more “user friendly.”

I increased the amount of baking soda and added some cocoa butter to the mix. Cocoa butter is not on the Simple Living Shopping List, but I just love the skin-soothing luxury of that stuff, so I couldn't resist. You could leave it out, and just increase the coconut oil, if you don't feel like buying more stuff. Here is the recipe I settled on:

Homemade Deodorant

½ cup baking soda
¼ cup corn starch
¼ cup coconut oil
1 Tbsp cocoa butter
Essential oils of your choice, 15-20 drops

Put the cocoa butter in a bowl and  microwave on 50% until just melted. Add in the rest of the ingredients and mix well. Pour into your desired container. In theory, this stuff should firm into a solid. But...

I tried putting this batch into an old, washed out commercial deodorant container (with the leftover just going into a small jar) but it didn’t work out so great.  It was definitely not at all solid, which is what I was going for, but more like a thick cream. As I mentioned in my last post on this subject, I think this is still due to the fact that warm temps this time of year don’t allow the coconut oil to firm up enough. I put it in the fridge, and it was perfect! However… I don’t really want to keep my deodorant in the fridge, as that’s not very convenient. I will be curious to see how this recipe works when the cooler fall weather arrives.

So, to sum up: Current batch still effective, but still messy, unless you refrigerate it. Hmph.

If you try this, let me know how it works out for you! This is still very much an “in progress” experiment, so I welcome any suggestions or insight!

Sunday, July 29, 2012

Basil Pesto


It was a busy day in the Homestead kitchen yesterday! I made two huge batches of pesto, a batch of pickles, froze some green beans and made some pizza dough, which, along with some of that pesto, turned into some pizzas for dinner!

But let’s talk more about that pesto! Our basil plants are growing like crazy… look at this harvest from yesterday!

When the basil is extra-plentiful in summer, I like to make up lots of pesto to freeze for the winter, so we can enjoy one of our favorite summer flavors year round. This recipe makes a pretty good amount, but you can half or double this to suit your needs, and the amount of basil you happen to have on hand. NOTE: This is a vegan pesto, without cheese. I feel like it freezes better without the cheese in it, plus, I like to use this cheese-less pesto on pizzas, when I am already using other cheese.  If I’m using this on pasta, I add some grated cheese to it when I thaw it out. It’s also perfectly delicious as is, for those who cannot have dairy.

You will need:
4 cups of basil leaves (fairly packed)
4-6 cloves of garlic (depending on how garlicky you like it)
½ cup of pine nuts or walnuts
¾ cup of extra-virgin olive oil
Salt to taste

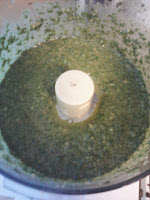
Put the garlic cloves into the food processor and pulse a bit. Add the basil and nuts, then run the processor while drizzling in the oil. Add salt to taste.

After this is made, you can set aside some to use straight away, then spoon the rest into an ice cube tray, cover with wax paper and freeze. Once the cubes are frozen, just store them in a zip bag or container in the freezer. To use, just take out the amount you need, and thaw. We use this on pasta, on tomato and mozzarella sandwiches, on pizza and even in omelets. We’ve even been known to just spread a little on a hunk of bread or a cracker for a little snack! We really love our pesto, around here!
A small slice of crusty bread with pesto & sliced red & yellow cherry tomatoes... YUM.

It's a rainy day here, today, so it's another good day to spend in the kitchen, preparing food for the busy week ahead. I've got some bread dough to start, some veggies to prep, and I'll be making a big pot of bean chili to freeze.  

Friday, July 27, 2012

Pickles!


I’ve done quite a bit of canning over the years, but one thing I have never gotten around to making is PICKLES! I keep saying I’m going to, but I never seemed to have enough cucumbers at one time (my kids LOVE them, so even if I get a few each day from the garden, they’re usually gone before we pick more the next day!)

But this year, our cucumber patch is producing more! I did put in a couple of extra plants this year, in the hopes that we’d have a better harvest… apparently, it worked!  And, finally, I made those pickles I keep talking about!

Pickles!
Since this was my first attempt at pickles, I decided to try a small batch, to start. I used this recipe, and made 1/2 batch (2 jars).  I must say, this was one of the fastest, easiest canning projects, ever. Start to finish, less than an hour! They need to sit for a couple of weeks before we open them, though… so we won’t know until then how they taste.

While I was mixing up pots of brine anyway, I decided to whip up some Pickled Green Beans, too! I used the recipe from www.pickyourown.org, which, by the way, is a good resource for those who are new to the business of canning.

Pickled Beans!

Now the weekend is upon us, and both our garden and our farm share seem to be providing us with lots of goodies! So I will be spending a good bit of time in the kitchen over the next couple of days, preserving some of our bounty for the cold winter months. I have some old tried-and-true recipes that I'll be using, but I’m always on the lookout for more. Do YOU have any good pickling, canning or freezing recipes?

Thursday, July 26, 2012

Homemade Window and Glass Cleaner


We have a lot of windows and mirrors in our home, and LOTS of little fingers, which means we end up with lots of little glass smudges that need to be cleaned up on a regular basis! I take care of all those little fingerprints with my own homemade, all-natural glass cleaner. I also use this stuff like an “all-purpose” cleaner, for wiping down the bathroom counter, cleaning the kitchen appliances, etc.  Here is my recipe!

2 cups of water
½ cup of white vinegar
A little splash of castile soap (I don’t measure, but the amount is probably between ¼ and ½ teaspoon)
10-15 drops of essential oil of your choice (see note below)

Just mix all of the ingredients up in a clean spray bottle. You can re-use an old one from a commercial cleaner (just make sure it’s washed out well) or you can buy plastic spray bottles at any pharmacy or discount store.  Use this as you would any other spray cleaner!

The essential oil serves two purposes in this recipe. Mostly, it makes this stuff smell better, as the smell of the vinegar can be off-putting to some. But also, if you’re going to use this as an “all purpose” cleaner for counters and such, it’s nice to use an essential oil which has some antibacterial properties.  Here are some to try:

Tea Tree
Cinnamon
Lemon
Geranium
Rosemary
Thyme
Lavender
Eucalyptus
Peppermint
Clove

Please note, if you've been using commercial cleaners, you may find that you get a lot of streaks the first time you use this. That's the buildup from the old cleaners! Just keep re-spraying and wiping a few times to remove the buildup, and that should take care of it.

In other news... I'm going to try making pickles today! My kids usually eat up all the cukes from the garden as they're picked, but this year we've got an extra good crop, so I finally have extras to can. I'll be posting about this adventure tomorrow, perhaps! 

Wednesday, July 25, 2012

Sometimes Even The Simple Life Feels Complicated


Lately, I’ve been struggling A LOT with the challenge that all working mothers face: Balancing Work, Home and Family.  Working is not a choice for me... I must work in order to support my family, but... I also made the choice a long time ago to do whatever it takes to be at home with my kids, homeschooling them and raising them according to my beliefs and ideals. I have always taken the job of raising my kids very seriously. I believe that having children is such a privilege, and I’ve always tried to give them my very best. But lately, I find that the responsibility of raising a family, homeschooling and taking care of things on the homefront while running a home business (which requires me to put in a minimum of 60 hours a week) has taken its toll. Most of the time, I don’t feel as though I’m doing ANY of those things particularly well. I know that I’m not alone in feeling this way… I have heard other moms with demanding jobs voice similar concerns. It is SO difficult to be Present for our family when we’re feeling stressed out about financial burdens, mounds of paperwork, responsibilities and deadlines.  I’ve been trying to work on this issue of finding balance for quite some time… I no longer work on weekends, unless it’s extremely important (like a tax deadline, or a class I need to finish) I now try to be done with all work-related tasks by 7pm in the evenings. . I’m trying to get some good, solid, consistent routines in place to help me manage my home and life in such a way that things run smoothly.  I’ve been trying to find outlets for my stress (running, when I can… and writing) so that I don’t take that stress out on my family. But, by no means do I have all the answers to this age-old dilemma. I’m figuring it out, as I go, finding some things that work, and making some mistakes, as well. This is very much a Journey Toward Simplicity.

Tuesday, July 24, 2012

Garden Trading


My cucumber vines have been SO prolific this week. I’ve been up to my ears in cukes, and just haven’t had the time to make up some pickles. My neighbor had a similar problem… but instead of cucumbers, she’s been swimming in a sea of Swiss Chard.  Gardens are funny like that… sometimes when something is in season, it’s REALLY in season, so you find yourself eating the same vegetables day after day, for weeks at a time, scouring the internet for new and exciting ways to serve them. But if you have a friend or neighbor who also gardens, you can break up the monotony and get more variety by trading things you have in abundance! Last night I brought my neighbor five cucumbers and a small bunch of oregano, and she gave me this huge, gorgeous bunch of Swiss Chard!

Isn’t it beautiful?!  I plan to sautee this up in olive oil, with some minced garlic and a touch of sea salt. YUM!

Monday, July 23, 2012

The Great Homemade Deodorant Experiment of 2012, Part 1


For so very many years now, we’ve been hearing about the dangers of commercial deodorants. Research has shown that daily use of deodorants containing aluminum and parabens can increase our risk of cancer… yikes! Seems like a very good reason to skip our traditional deodorant and try out something natural, right? Yet somehow, although I’ve removed most all other chemical personal care items from my life, I was hesitant to give up my old deodorant, for fear that I’d end up stinky and embarrassed. I did try switching to Tom’s of Maine natural deodorant once, but it made me break out in a rash with the first use. Damn sensitive skin! So I switched back, because at the time my desire for sweet-smelling and rash-free pits won over my chemical fears. No, I am not proud of this vanity! But now, finally, a good 10-15 years after I first heard of the dangers of deodorant, I finally decided to take the plunge, and give up traditional deodorant for good!

Now, let me just begin by telling you that I embarked on this little experiment during the month of July in New England, when temps were in the 80’s to upper 90’s! It was quite a chance to take, but I figured if I could find something that kept me fresh in this weather, it had to be good, right? Also, it happened to just be when I ran out of my regular stuff. So… The Man of the House agreed to support me in this adventure, and promised to (very nicely, of course) let me know if things got… unpleasant. So the experiment began!

Day 1: I found a recipe online which looked easy…plus, I already had all the ingredients on hand (Hello, Simple Living Shopping List!) This particular recipe was made with baking soda, corn starch, Coconut oil and essential oil. I mixed it all per the instructions, but the consistency wasn’t quite what it was supposed to be (very gloppy!) but I assume that’s mostly because it’s been so hot here that the coconut oil is all melty and liquidy. Still, I think next batch I might try using less oil, to see if that makes it a little thicker and less messy.

So, I poured the gloppy deodorant mixture into a little jar, and put some on, using my fingertips (much messier than my old stick) and waited to if it kept me from getting stinky.

End of Day 1: Still smelled good! Though, The Man of the House was already tired of hearing me ask, “Do I stink?” He reassured me multiple times that I smelled just fine… Bless him!

Day 2:  When I opened the jar this morning, I noticed that the oil had separated a little bit from the solid, but I just stirred it back up and put some on again. It was 90-plus degrees, and my pits were fresh smelling all day! Dare I say, I felt like it might have worked even better  than my regular deodorant?!

Day 3: Same as Day 2… except… Uh oh! I noticed my left armpit stung a bit! Hoping it was just some razor irritation, and not from the deodorant! Also… I went for a run in 80+ degree weather today… very sweaty, but no stinkiness!

Day 5: Razor irritation is gone, and armpits are feeling good and smelling good! Still not thrilled with how messy and gloppy this stuff is, though. Going to try tweaking the recipe and making a new batch.

As of today, I still haven’t gotten around to making that second batch! (Been very busy with Birthday Celebrating, and taking care of some work stuff!) But I plan to get to it this week, and will post the results. Meanwhile, I'm still using the gloppy batch, and still feelin' good! 

Happy Monday, Everyone!

Sunday, July 22, 2012

The Birthday Just Keeps Getting Better!

If you teach your children to bake, and you are VERY VERY Blessed and Lucky (Like me!) then you just might get one of these:


Ladybug baked this for me (from scratch!) while The Man of the House and I were out on a Birthday Date. Such a nice surprise! This has truly been a wonderful Birthday! I feel oh-so-Blessed and Loved!

Birthday Bliss

I promise that I am working on a post about Homemade Deodorant, which is coming soon (perhaps tomorrow?) But as for most of this weekend, I'm busy celebrating my Birthday with the ones I love, doing stuff like this: 


I am one lucky Mama!

Friday, July 20, 2012

Our Garden


Cucumber, which share a bed with carrots, beets and annual herbs
Once upon a time, I lived in small apartment in a city, with no yard. I dreamed of having a garden, but I had to make do with a few pots of herbs on my kitchen windowsill. Some years later, I moved to a house in another city, which had a teeny tiny yard. Still I dreamed of having a garden of my very own, so I planted some tomatoes, peppers and cucumbers in pots on my patio, and dreamed of the day when I would have a "real" yard and a "real" garden. In 2007 I moved to a house in the suburbs, this time with a yard, and I began to make the dream a reality. As of 2012, I now have seven 6x8 foot raised beds for various veggies, a 2x4 foot strawberry bed, a couple of new raspberry canes, two new blueberry bushes and a small perennial herb bed. My Garden provides food for my family, and brings me huge amounts of joy!
Cherry Tomatoes!

Peas, pole beans, with summer squash and zukes.

There is something about growing your own food, that is just so basic, so beautiful and so satisfying. I highly recommend it! Even if you have no space... start small. Even if all you can manage is a pot of basil on your kitchen windowsill, I promise you, you will be happier for it. I know I am!

Thursday, July 19, 2012

Super-easy Homemade Body Wash


So yesterday’s post was all about clean clothes… today’s post is all about a clean YOU!

I’ve been experimenting with various body wash recipes this past year… some have been easy to make but not great to use, while others worked well, but the recipes were way too complicated, with tons of ingredients, cooking stuff on the stove, etc. Who has time for all that?! Not me. So, it became my quest to come up with a recipe which worked well, but wasn’t too complicated. Here are the results!
 
1 cup castile soap (I like Dr. Bronner’s unscented)
2 tbsp olive oil or almond oil
1/4 cup filtered water (or water that’s been boiled and cooled)
20-30 drops of essential oil of your choice (see note below)
(If you choose to use already-scented castile soap, you can skip the essential oils)

Combine all ingredients in a jar. Swish gently to blend. This body wash is on the thin side, so I pour it into one of those foaming soap dispensers to use.That’s it! See how easy that was? 

A note about the essential oils: In our last couple of batches of body wash, I have used Tea Tree Oil, which has anti-bacterial properties, is great for your skin and has a nice clean scent, which is suitable for everyone in the family. In previous batches, I have used sandalwood and vanilla (sensual, woodsy and slightly sweet) and vanilla and lavender (the kids’ favorite… great for bedtime!) Feel free to experiment with scent combinations that appeal to you and your family! 

Wednesday, July 18, 2012

Homemade Laundry Soap


With between 5 and 7 people living here at any time, plus running a home daycare, we do A LOT of laundry here at The Homestead! Since I don’t want all kinds of harsh chemicals in my family’s clothes, and all-natural detergents are expensive, I choose to make my own Laundry Soap! It’s easy, economical, all-natural and effective. I put its effectiveness to the test several months ago, as I tried to drink coffee in the car while wearing a white blouse. Oops. I thought for sure the blouse was ruined, but I washed it with this soap and the stains came out, first try!
Before you begin, make sure you have a really big bowl (we use a big plastic one from the dollar store) some rubber gloves, and all your ingredients together.  Note: These ingredients are all found on my Simple Living Shopping List.

Mama’s Homemade Laundry Soap
2 cups borax
2 cups washing soda
2 cups baking soda
½ cup castile soap (we use Dr. Bronner’s baby mild, unscented)
1 ¾ cup white vinegar
20 drops of essential oil, your choice (we use lavender, but you can used whatever scent you prefer!)

Put on your rubber gloves. Dump all the dry ingredients into your big bowl. Break up any lumps. Add the remaining ingredients, and start mixing it together with your hands. At first, the mixture will be like a thin paste, but as you mix it will get thicker. Just keep mixing with your hands, doing your best to break up lumps with your fingers. After a couple of minutes, it will get to what I call “The Feta Cheese Stage” which means it will become the consistency of crumbled feta. Still keep squishing and mixing until it becomes powdery again. There will still be a few small lumps, but that’s ok. They will dissolve in the wash when you use it.
Now, just transfer your finished laundry soap into a covered container. I use an old glass flour canister, which used to belong to my grandmother, but a simple Tupperware container is fine, too. Use ¼ cup per load of wash.

Carrot Quinoa Soup


I’m working on a post for tonight with a recipe for my Homemade Laundry Soap, but I just wanted to really quick post a recipe for the soup we had last night for dinner! A few days ago I posted about using the greens of your root vegetables… Well, we did that here, with carrot tops, this time… in Carrot Quinoa Soup! I hope you like it!

Olive oil
1 large onion, diced
6 large carrots, with greens
2 large stalks of celery, chopped
6 cups of vegetable stock
1 cup of quinoa, rinsed
1 Tbsp chopped fresh thyme
Salt and pepper to taste

Separate the carrots from the greens. Separate the leafy parts of the greens from the stems (a note about carrot tops: like most greens, they need a very good rinsing to remove grit before using) Chop the leaves and set aside, then chop the carrots. Chop the onion and celery, then put the onion, celery and carrots into a soup pot with some olive oil. Cook until the onions are translucent. Next, add the stock, quinoa, thyme and greens. Simmer for 30 minutes or so, or until the quinoa is cooked. If it’s too thick, as a smidge more stock or water. Season to taste with salt and pepper. Enjoy!


Tuesday, July 17, 2012

The Simple Living Shopping List


Three of the rules that I try to live by in my quest for Simplicity are: Be Green, Spend Less, and Have Less Stuff. When it comes to cleaning products for our home and personal care products for our bodies, most of us break all three of those rules!  Here are the items that most families buy on a regular basis, to keep their homes and bodies clean and presentable:

Soap/body wash
Facial cleanser
Shampoo
Conditioner
Children’s/baby shampoo
Facial moisturizer
Body lotion
Perfume/cologne
Toothpaste
Deodorants (different brands for different family members)
Hand soap
Various Hair styling products
Shaving cream
Dishwashing detergent (hand washing)
Dishwasher detergent
Laundry detergent
Toilet cleaner
Tub and tile cleaner
Window cleaner
All-purpose spray cleaner

While it is certainly possible to find "Green" versions of most of these products, those brands tend to be VERY expensive. And the affordable brands are full of nasty chemicals. So what’s a Simple Mama to do? Well, let’s start with the Simple Living Shopping List:

Castile soap (We buy Dr. Bronner's unscented)
Baking Soda
Vinegar
Borax
Washing Soda
Sunflower Oil
Almond oil
Olive Oil
Coconut oil
Castor oil
Essential Oils

With these ingredients, and a few good recipes, you can make everything you need to keep your home clean and pretty, and to keep yourself and your family clean and pretty, too!  And chances are, many of these items are probably in your kitchen already! In the coming weeks I will be sharing some of our family’s favorite recipes for cleaning and personal care.  Stay tuned!

Sunday, July 15, 2012

Radishes, Carrots and Beets... Oh My!


Question: What do beets, carrots and radishes have in common? Answer: They all have nice green leafy tops that usually end up in the compost, while we eat the delicious roots. But guess what? Those greens should be on your dinner plate, instead! Growing your own root vegetables (or getting them from your local farm or farmers market) is like getting two vegetables for the price of one.  There are literally hundreds of recipes floating around the internet for beet greens, radish tops and carrot tops.  A quick Google search will give you plenty to choose from! I like to use carrot tops in soups, along with the carrots! The greens have a nice, carrot-y flavor and those green lacy leaves look just beautiful in the bowl.  I’ve used radish tops tossed into a stir fry (along with some shredded radishes) or tossed with pasta.The radish greens have a nice peppery  flavor, a little bit like arugula, but not quite.

But my favorite root vegetable top by far is Beet Greens! I love them sautéed, as you would use Swiss chard. In fact, I think they taste very similar to chard! Tonight for dinner we had Millet with roasted beets and beet greens. I love the way beets spread their color throughout whatever dish you put them in… in this particular recipe they turn the millet a beautiful pink! Here is the recipe!

1 cup Millet, cooked
One large bunch of beets, with greens
One medium onion
Olive oil
Salt and pepper to taste

Separate the beets from the greens. Scrub the beets, rinse the greens well. Rub some olive oil on the beets, wrap them in foil and pop into the oven at 400. Cook until they can be easily pierced. Meanwhile, chop up the onion. Cook the onion in olive oil over medium-low heat while you’re chopping up the beet greens. When the onions are translucent, add the greens to the skillet as well, cooking until they are wilted.  When the beets are done roasting, peel them and dice them, and add them to the skillet. Add the cooked millet and a little more olive oil (optional) and combine. Add salt and pepper to taste.


Sometimes, I like to add a little crumbled feta cheese or some chopped walnuts. You can also substitute almost any other grain for the millet, such as quinoa, barley or brown rice.

 Enjoy!

Saturday, July 14, 2012

CSA=AWESOME


I absolutely LOVE the idea of Community Supported Agriculture!  CSA is good for your family, because you get the freshest locally grown produce, the day it’s picked. It’s good for your community, because your dollars are supporting your local farmers.  It’s good for Mother Earth, because your food doesn’t need to be shipped from far away via trucks that burn fuel and pollute the air.  So you see, CSA is good for everyone!  

There are many local community farms all across the country which sell farm shares...there may even be one in your community! Cost varies from farm to farm, but generally speaking, you’ll find that the amount of produce you get for the money in a farm share is a better deal than you get from the grocery store.  Our share works out to about $27 a week, and we definitely get more than our money’s worth!

Here is our farm share for this week:
Carrots, huge head of lettuce, potatoes, beets, onion, a bag of peanuts, Swiss chard, zucchini, raspberries, cucumbers and green beans.
Between our farm share and our garden, we get almost all the produce we need, and have some leftover to freeze and can for winter! We have a large family, and veggies make up the bulk of our diet, so that’s sayin’ somethin’!  

Here is some good information about CSA and how to find one near you:

Next post, we’ll talk about making the most of all your Summer produce, with recipes for using carrot tops, beet greens and radish tops!


Friday, July 13, 2012

Dinner Picnic at the Beach!


It’s been a VERY busy week, here at The Homestead! Work, some classes, a few appointments, and so on, left us feeling very Grateful for the weekend! We kicked it off right with a Friday Evening Beach Picnic! As  soon as we finished work for the day, we all piled into the van and headed up to the beach! It  was a bit chillier than we expected, but still, it was just what we needed! We splashed in the waves, chatted with friends, and most importantly, spent some quality down-time together, without any other distractions.

Our Bunch and Friends, splashing in the waves!


Noodlebug, warming up after swimming in the chilly ocean
Sunset. So Beautiful!

Thursday, July 12, 2012

Fresh, Homemade Bread (even when you’re busy!)


There are few things in this world that are as satisfying to both body and soul as a warm loaf of bread, fresh from the oven.  I first began baking bread on a regular basis when I was pregnant with my first baby. That pregnancy was the beginning of my desire to get back to basics, and baking my own bread from scratch, as our grandmothers and their grandmothers did, just felt right to me. Nowadays, most of the bread my family eats is homemade, mostly because it’s WAY cheaper than store-bought (particularly the all-natural brands, which we prefer) but also because it’s delicious, and because it still makes me feel good to nurture my family in this way. Now, I know what you’re thinking… “I can’t possibly bake bread for my family on a regular basis… I’m waaaay to busy!” Well, never fear… Mama is here to help! I’m very busy too, with working full time running my own business, homeschooling, taking care of home and family, gardening, writing, etc. But here’s how I make it work!


Here is the frozen dough, ready to thaw, rise and bake!
On weekends, I take some time to make a couple of batches of dough (recipe to follow!) The dough rises on the counter while I’m busy doing other things, then I shape the dough into loaves (usually 4 loaves for two batches of dough) and then I wrap the loaves and pop them in the freezer. During the week, I take a loaf out of the freezer in the morning. I lightly oil a cookie sheet and dust it with cornmeal, and place the frozen dough in the center. I cover it loosely with oiled wax paper and a towel and allow the dough to thaw and rise (usually about 4 hours, altogether) Then I pop it in the oven at 350 for 30 minutes or so. Fresh bread for lunch!                       

Here is my recipe...
Mama Jenney’s Easy Whole Wheat Bread
1 ½ cups of warm water
2 tsp active dry yeast
½ tsp sugar
1 cup warm (not hot) milk (you can use milk substitute, to make it vegan)
¼ cup oil (I use sunflower oil)
2 Tbsp honey (you can use maple syrup or molasses to make it vegan)
2 tsp salt
1/3 cup vital gluten
About 6 cups or so of whole wheat flour

In a large bowl, combine yeast, sugar and ½ cup of the warm water. When it’s all foamy (5 minutes or so) add the rest of the water, milk, oil, honey, and salt. Slowly start to stir in the gluten and flour, adding a bit at a time, stirring well after each, until it forms a soft dough. Turn the dough out onto a well-floured counter or bread board, and knead, adding more flour as needed to keep it from being too sticky. When you have a nice, uniform, soft, not-sticky ball of dough, place it in a large, oiled bowl, turning it over once to coat it with oil. Cover with a damp towel and let it rise until doubled in bulk (an hour or more)

Next, punch down the dough and divide it into two balls. Let the dough rest 5-10 minutes , then shape into loaves. If you’re going to freeze the dough for later, now is the time to do it! If you want to bake it right away, keep reading…

Lightly oil a cookie sheet and sprinkle it with cornmeal.  Place the loaf (or loaves) on the cookie sheet. If you are using a big enough cookie sheet, you might be able to bake two loaves at once. Just make sure there is some space between them as they will get much bigger before they are done.

Cover the loaves with oiled wax paper and a towel, and let them rise for another 30-40 minutes. Place into a preheated 350 oven, and bake for 30 minutes or so, until they sound hollow when tapped on the bottom.  Best enjoyed warm, but will keep covered in the fridge for several days.
Warm, fresh, whole wheat bread! Mmmmm...


Tuesday, July 10, 2012

Recycling: Not Just for Cans


One of the best ways to be green and be frugal is to recycle. I’m not just talking about the bottles, cans and paper you take to the curb on recycling day… I’m talking about recycling things like clothing, toys, books and household goods. There are plenty of good reasons to buy or trade used items instead of buying new. First of all, used items are a greener choice because the production of new items generates pollution and uses up valuable resources. Second, recycling older items rather than tossing them reduces the amount of trash in the landfills. Third, used items are always significantly cheaper… just perfect for those of us living on a tight budget.  And finally, sharing used items builds good will and a sense of community. That last reason is one of my favorites! Here’s an example of how that works: We have friends with older children… they give us clothing that their kids have outgrown. My kids have “new” clothes, which they love, and then we pay it forward by giving my kids’ outgrown clothing to our friends who have younger children. See how nice that is? Another example: Yesterday, a friend gave me some beautiful wood puzzles. Her children no longer used them, so she didn’t need them anymore. She got some clutter out of her house, and I was Blessed with some lovely new puzzles for my little daycare friends. Good feelings, all around!

There are many resources out there for finding stuff you need, as well as getting rid of stuff you don’t. 

Clothing: For kids clothing, try www.thredup.com or resale shops, such as the ChildrensOrchard. Or, try hosting a Clothing Swap! Invite fellow parents over, and ask them to bring a bag (or more) of outgrown, gently used clothes. Everyone can then go through and pick things they want to take home. Anything left over at the end of the Swap can be donated to a local charity. For adult clothing, there are trendy little resale shops popping up all over the place, these days.

Toys and baby equipment: Check places like eBay, Craigslist and good ol’ garage sales. Just use common sense when it comes to buying things like car seats and other safety stuff… make sure what you're buying is in good condition and hasn’t been recalled.  Recently, we purchased an awesome Little Tikes climber for the backyard through Craigslist for less than 1/5 of the cost of buying it new.

Household items and exercise equipment: Again, eBay and Craigslist are great! Also, check your local Freecycle or neighborhood garage sales. I have several pieces of furniture which were acquired from garage sales and church rummage sales. I love “vintage” pieces with personality! A couple of years ago I decided I needed a treadmill so that I could run even when we’re in the midst of our New England winter… I picked up a used-once one for $70 via Craigslist.

Books: Look for a used book shop in your community, or check out sites like alibris.com and half.com You can also find used books on Amazon.com. And don’t forget to make use of your local library!

One word of warning… it’s easy to get carried away when buying used, because it’s so cheap! You might find yourself buying things you don’t necessarily need, just because they seem like a good bargain. Remember the “one item in, one item out” rule from my kids’ organizing post, even when buying used. And don’t forget to donate those “items out” so that they can be recycled, too!

Monday, July 9, 2012

Raspberries!!!


Just a quick post, to share a wee little garden accomplishment: Last year we added some raspberry plants to our garden here at The Homestead. And now, we have some actual raspberries! Just a few cute, tiny raspberries… but raspberries all the same!  The raspberry plants were added to the area of our garden which is also home to a strawberry bed and two small blueberry bushes.  All of this was planted in the last year or two, so we don’t have too much fruit coming to us, yet. I am hopeful that one day we will get enough berries to maybe make a little jam, but for now, I’m happy with the occasional handful of berries to toss into my yogurt. 


Later this week, I will share some photos and thoughts about the rest of our garden! But for now, I'm busy working on a post for tomorrow about reducing, reusing and recycling! 

Sunday, July 8, 2012

Containing Kids' Chaos, continued...


So, as I mentioned last post, I thought it might be fun to share some photos of some of our toy storage areas, so y’all can see some of the tips I mentioned in action. Because we run a home daycare, in addition to having a bunch of our own kids, we tend to have more toy storage areas than the average family! So I will just post a few pics for now, so as not to overwhelm! Here we go!

First up… our crafting area. This is an area we REALLY struggle with, and this bookcase is constantly being re-organized. I am still trying to find a way to make this area look less cluttered, but in the interest of complete honesty (I don't really have this stuff completely figured out... remember, this is a journey!) I figured I ought to show it! This bookcase is opposite a built-in cabinet which holds our homeschool supplies, in a little alcove of our kitchen, which we usually refer to as our "homeschool area." On top of the bookcase, we have plastic boxes from the dollar store, which hold painting supplies. Under that, we have blue drawer things which were purchased from IKEA at least 8 years ago. I originally purchased them to hold cds, but now they are the perfect size for small craft items. The kids' laptop is on the next shelf, and then under that we have our "drawing/writing shelf" which holds writing paper, construction paper and drawing paper in stacked paper trays, along with markers, crayons, chalk, etc. The baskets at the bottom contain small dry erase boards (and their markers) and play dough stuff. As you can see, everything is labeled, so the kids know where everything is, and where to put it back when they are finished with it. 


The next two photos are from our daycare area.
This first photo shows part of our block area. As you can see, we have put pictures on the labels here, so the little ones can find what they need to play.

 This is where we store our puzzles (stacked on the upper shelf) and some other things:

This shelf is in our girls’ room. I purchased these lavender-colored wooden bins at Target when Ladybug was about 2 years old. Back then, they held things like paper dolls and blocks, but now 10 years later, they hold various “big kid” craft supplies. These bins were more expensive than some. I think at the time I purchased them, they were about $15 each, but obviously they have stood the test of time, and were well worth it.  These bins should last until college and beyond, as they can always be repainted if the girls get tired of the color.

So there you have it! One final thought as I end this post... Keep in mind that toy storage in your home will evolve and change as your kids grow and their needs change, so if you choose to use labels,  it's a good idea to make them so they can be changed out without too much trouble if the contents of the basket changes. 

Do YOU have any tips or ideas for staying organized with kids? I'd love to hear them!


UPDATE, January 2014: The above-mentioned troublesome craft area  (along with the adjacent homeschool area) has been totally renovated!


Saturday, July 7, 2012

Containing Kids’ Chaos!

How many parents out there have just resigned themselves to the idea that having kids means you have to deal with being surrounded by their clutter? Quite a few, I would bet! But the good news is, you don't and you shouldn't! Living in a clean, uncluttered environment is good for them and it's good for you. Being surrounded by too many toys and clutter actually makes it harder for kids to play because they get too overwhelmed by all the "stuff" around them.We must remember that play is very omportant work for children; it helps them to learn and make sense of their world! So, by helping your kids simplify and organize, you are helping them reach their full potential! Now, doesn't that feel good?

Here are my 5 tips for keeping your home organized when you have kids: 

1.  Say NO to more stuff. Contrary to what your child tells you, they will NOT die if they don’t get the really cool toy that the neighbor kid has. Start now, teaching your kids that keeping up with the Jones’ isn’t necessary. Keep the toy-buying to only holidays and birthdays, and if your child does get a new toy, then follow the “one item in, one item out” rule and have them choose something they no longer use to donate. In our family, we reassess all of the toys in the house at Christmas and birthday times, clearing out the things they’ve outgrown or no longer love to make room for the new things they’ve received as gifts. Which brings us to our next tip…

2. Quality over quantity. It’s not how many toys your kids have, it’s the quality of those toys! Your kids will get more “play value” with open-ended toys which allow them to use their imagination. Steer clear of that electronic beeping toy that only does one thing… your child will be bored with it in a month’s time. Instead, opt for things like blocks, dolls, vehicles, dramatic play items, etc… toys that can be used multiple ways and for many years (and encourage well-meaning relatives to do the same)

3. A place for everything, and everything in its place.  To store toys and other kid paraphernalia, find baskets or bins to separate toys by type, and then label the baskets. For pre-readers, it’s helpful to have pictures on the labels, as well. This makes clean-up time easier for the little ones, as they will soon learn where each item belongs. Inexpensive bins are readily available from places like IKEA, Target or even your local dollar store.

4.  Encourage regular “clean ups” throughout the day. Yeah, this tip is a little trickier to follow through on, but try to encourage your kids to tidy up regularly. In our family, we have regular “clean up” times at certain times of the day: before we go out, before lunch and before dinner. We also encourage the concept of putting away one item before taking out another. This doesn’t always work, but we try!

5. Lead by example. Remember that old saying “Do as I say, not as I do?” Yeah, well it doesn’t work. Your kids are watching you, and learning from your behavior. Clean up your own messes as you expect them to clean theirs. When you get a new item for your home,  get rid of one item, to keep your own clutter in check.  

Now, if you are currently swamped under way too much stuff, give yourself a little time to work through the clutter. Maybe start by helping your kids choose one item per day to give away, and one piece “junk” to throw away (I’m talking about those little party favor toys that make their way into your home, or broken toys, or things with missing pieces) In time, you will have things pared down enough that it will be easy to organize and maintain.

Next post, I will show you some pictures of our home’s toy and craft storage areas, so you can see how we implement some of the above tips!

Thursday, July 5, 2012

Welcome!

Welcome to the very first post on my shiny new blog! Where to begin!? I guess I'll start by sharing my goals for this project. I hope that this will become a place for sharing ideas, information, recipes, activities and tips for living a simple life. But what does that mean, exactly... "A Simple Life?" For some, it means living with less "stuff", or choosing green products and practices. For some it might mean finding ways to spend less money, or finding more free time to cultivate truly meaningful relationships. For me, it means all of those things and more.

In the coming weeks, I will be discussing tips for organizing a home with kids, juggling work and family, and the Simple Essentials Shopping List. I will also be sharing recipes for homemade cleaning products and homemade bath and beauty products. I will share my secret for how to have fresh, delicious (and economical) homemade bread when pressed for time, and I will be talking about backyard gardens, CSAs and fun, free things to do as a family.

Check back here often, and join my family as we continue our journey toward a more meaningful, satisfying life together.